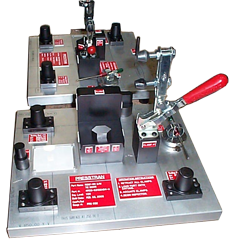
Gauge & Fixture Gallery
Inspection Gauges and Fixtures
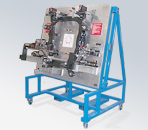 The tilted fixture base design of this inspection fixture allows for a single operator to load and unload the part. The fixture is shown with a part assembly already loaded.
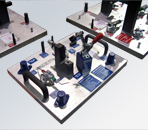 The single locating pin and single clamps make part positioning in this fixture virtually error-free. This Inspection fixture has side handles for easy handling.
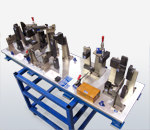 This Inspection fixture uses a 4-way locator and four clamping datum points to position a tail gate assembly for inspection. The operator checks twenty inspection points for part location, pin, and hole placement.
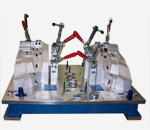 This inspection fixture checks the right and left head lamp bracket produced on a progressive die. The parts are placed on the contoured fixture surface and clamped on 3 datum points. The toggle levers and go nogo gauges check for hole clearance and sizing.
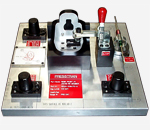 This Inspection fixture uses three locating pins and one clamp to secure a retaining rod cross member reinforcement bracket. The bracket angle is gap-checked after clamping.
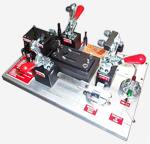 This checking fixture uses two pins and 3 clamps to secure the part on 4 datum points. A feeler gauge is used to ensure the part is flush to the fixture prior to inspection. A sliding step gauge checks the part once it is loaded.
SPC Gauges and Fixtures
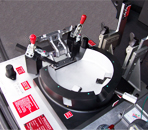 This SPC Inspection fixture is used to clamp the fuel filler lid assembly to two datum points on the lid hinge. Two template fixtures are used to measure four holes. Part clearance and flatness are also measured.
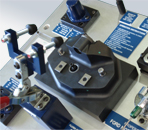 This SPC fixture uses two locating pins and one clamp to secure a front bumper mounting bracket to two datum points. A critical hole diameter is measured once the part is clamped.
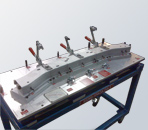 This fixture has two locating pins and end stops to easily position the part on the fixture prior to inspection. Each toggle lever lifts a single pin so the operator can perform a visual check. Twelve built-in toggle levers are used to check for part hole clearance.
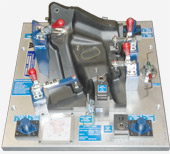 This SPC fixture is used to check a front retaining rod bracket. The part is clamped at 4 datum points. A drop template is used to check one of two critical hole positions.
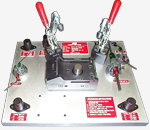 This SPC fixture features a prominent center locating pin and part radius which allows the operator to easily orient the part on the fixture. A raised shoulder prevents oversized parts from being loaded. The trim edge is marked for visual inspection.
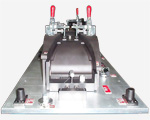 This Inspection fixture uses three clamping datum points to position a structural cross member for inspection. The inspection fixture uses sliding templates to check hole positions and trimlines on the end sections. Three clearance slots are present for the mid-point and part radius checking.
 The tilted fixture base design of this inspection fixture allows for a single operator to load and unload the part. The fixture is shown with a part assembly already loaded.
 The single locating pin and single clamps make part positioning in this fixture virtually error-free. This Inspection fixture has side handles for easy handling.
 This Inspection fixture uses a 4-way locator and four clamping datum points to position a tail gate assembly for inspection. The operator checks twenty inspection points for part location, pin, and hole placement.
 This inspection fixture checks the right and left head lamp bracket produced on a progressive die. The parts are placed on the contoured fixture surface and clamped on 3 datum points. The toggle levers and go nogo gauges check for hole clearance and sizing.
 This Inspection fixture uses three locating pins and one clamp to secure a retaining rod cross member reinforcement bracket. The bracket angle is gap-checked after clamping.
 This checking fixture uses two pins and 3 clamps to secure the part on 4 datum points. A feeler gauge is used to ensure the part is flush to the fixture prior to inspection. A sliding step gauge checks the part once it is loaded.
 This SPC Inspection fixture is used to clamp the fuel filler lid assembly to two datum points on the lid hinge. Two template fixtures are used to measure four holes. Part clearance and flatness are also measured.
 This SPC fixture uses two locating pins and one clamp to secure a front bumper mounting bracket to two datum points. A critical hole diameter is measured once the part is clamped.
 This fixture has two locating pins and end stops to easily position the part on the fixture prior to inspection. Each toggle lever lifts a single pin so the operator can perform a visual check. Twelve built-in toggle levers are used to check for part hole clearance.
 This SPC fixture is used to check a front retaining rod bracket. The part is clamped at 4 datum points. A drop template is used to check one of two critical hole positions.
 This SPC fixture features a prominent center locating pin and part radius which allows the operator to easily orient the part on the fixture. A raised shoulder prevents oversized parts from being loaded. The trim edge is marked for visual inspection.
 This Inspection fixture uses three clamping datum points to position a structural cross member for inspection. The inspection fixture uses sliding templates to check hole positions and trimlines on the end sections. Three clearance slots are present for the mid-point and part radius checking.
